Hello again!
Today I thought I'd do a review post. Last year, around November time I bought the Younique Moonstruck 3D Fibre Lash Mascara Set. For me, I've had lovely outcomes! Hope you enjoy!

It comes packaged up really nicely in this little leather-look hard case. I think is a really good way of looking after and protecting the products, as well as it looking really nice!
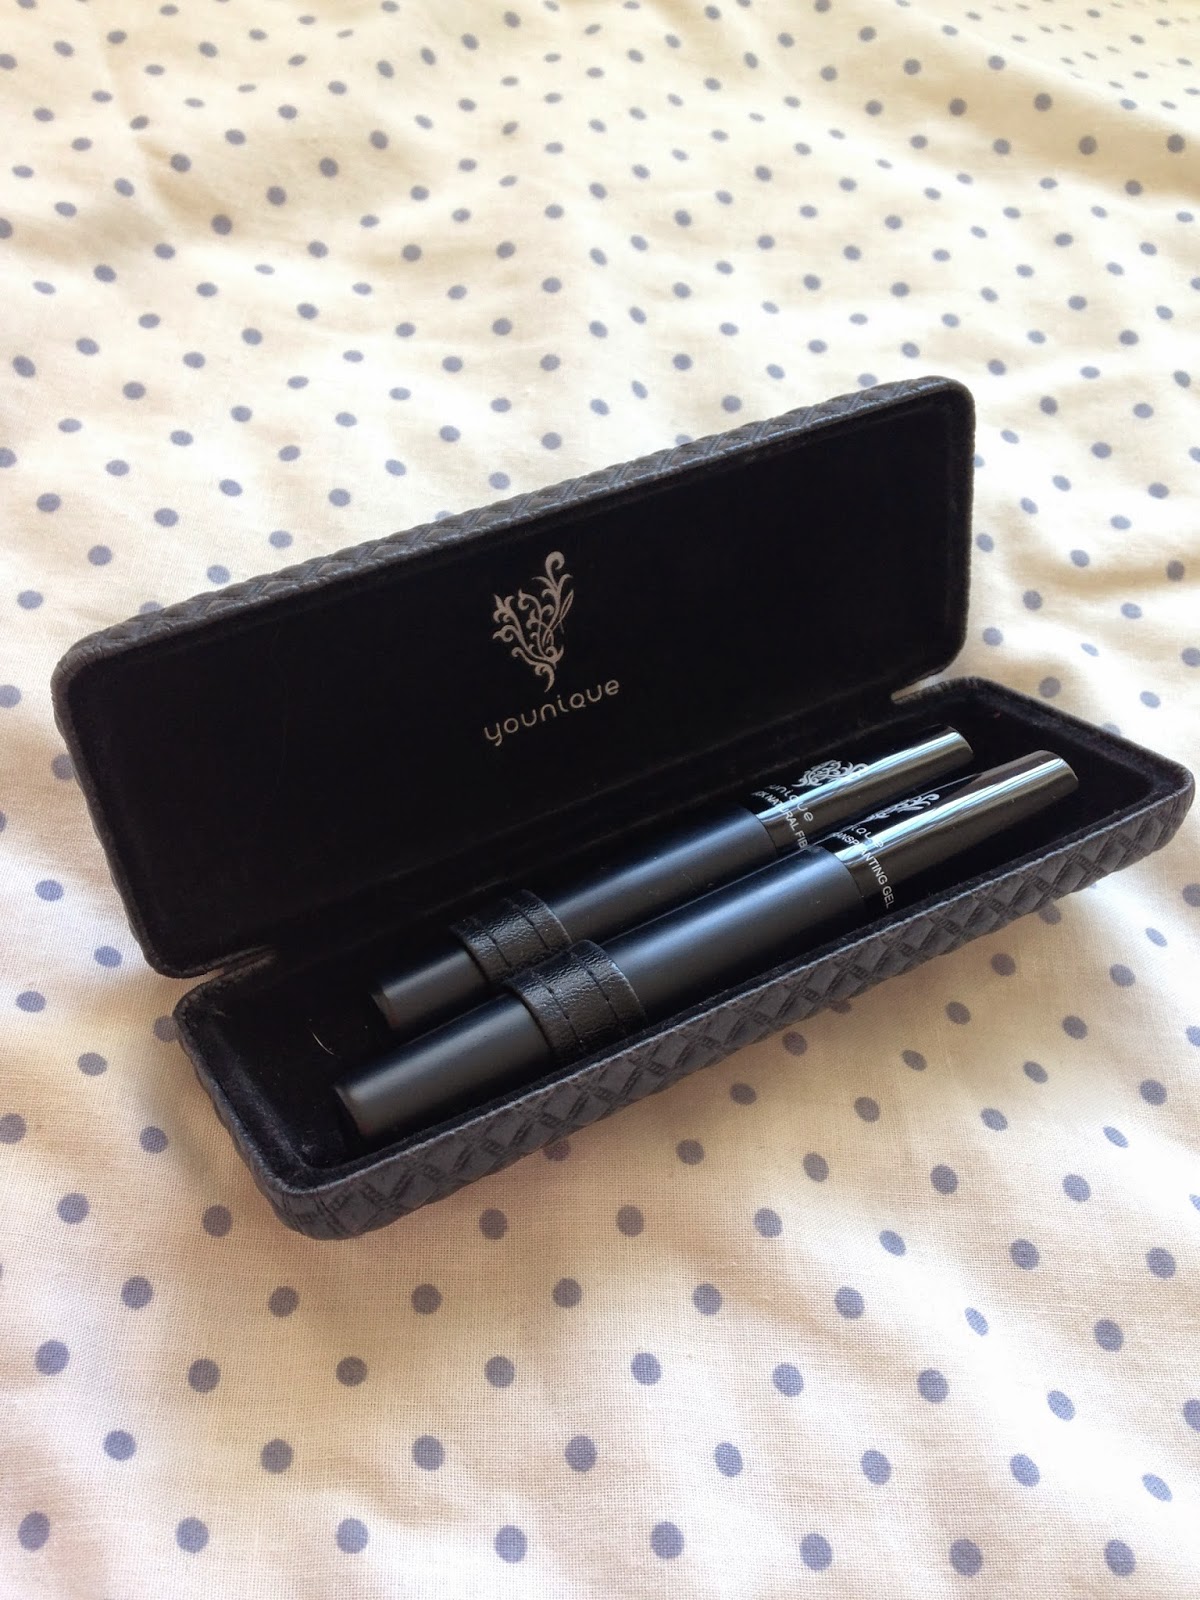
This is how the mascaras look inside. There is two small straps on the inside of the case so that the mascaras can be put inside without them slipping around, I think this is really useful and again looks really nice!
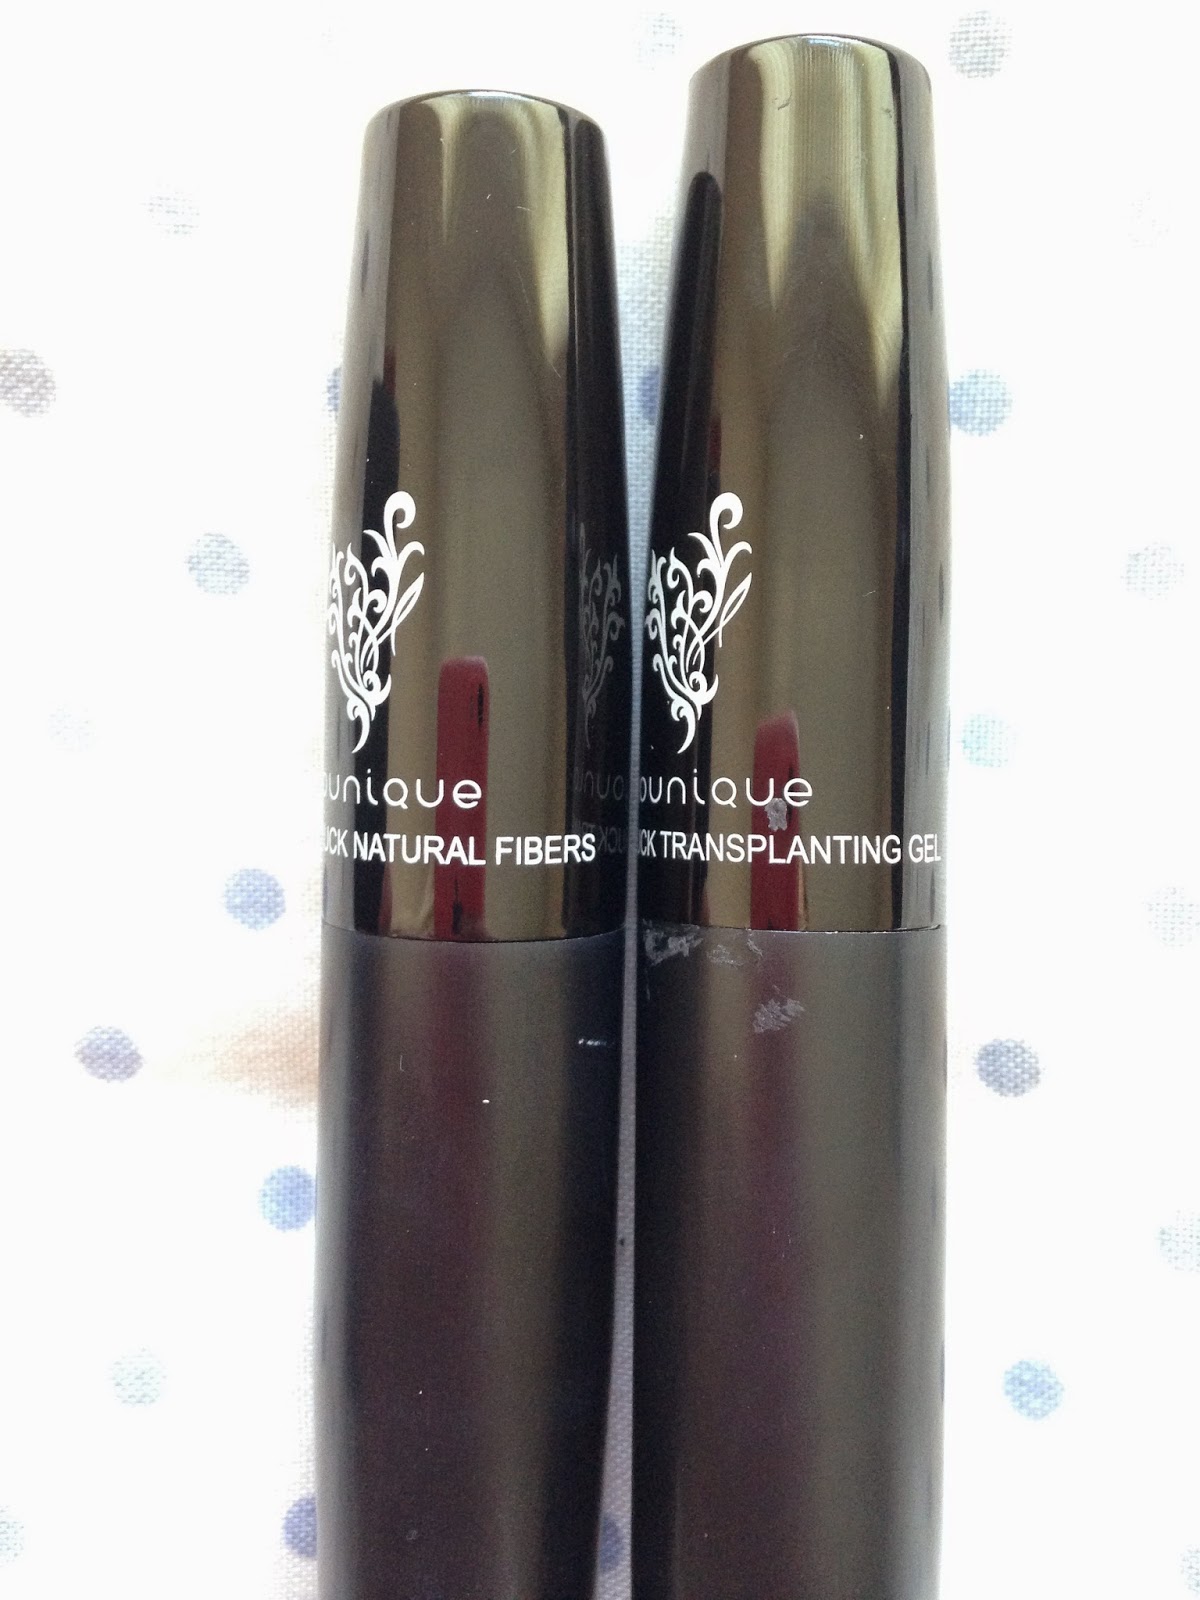
So these are the two mascaras. They are both packaged in a metal tubing, I like this because they are heavier therefore I think they are easier to use and also they are always kept cool so they are never too liquidy as I think if mascaras are warm they can be a bit gloopy and harder too apply. The smaller one is the fibres and the bigger one is the gel.


This is the Moonstruck Transplanting Gel. This looks like a normal mascara, It has an average size brush. This is the bigger tube therefore this is obviously the product that would get used up quicker. Its black so if you were to use it just for mascara I think that would work as I think the transplanting gel itself is quite lengthening.

This is the Moonstruck Natural Fibres, This is the one that does all the magic! This is the smaller tube so it lasts quite a long time as the fibres are all condensed into a tube. The fibres look like little pieces of black fluff and look rather strange when you first apply these to your lashes!
How to use the mascaras:
You start by applying your normal every day mascara before using any of the fibre lash mascaras, You also need to wait until the normal mascara is completely dry if you want to get the best results. You can then start with the Younique products. Firstly, apply the transplanting gel all over your lashes then, you lightly brush the fibres onto the lashes, You need to do this quite quickly after applying the transplanting gel as the fibres won't stick when the gel drys. You then reapply the transplanting gel over the top to seal the fibres. You can build this product up as much as you want so that you can get extra long lashes if that's what you prefer. However it doesn't work if you try to apply too much at once otherwise the fibres will start to fall underneath your eyes and won't stick to the lashes therefore the best way to get the best results is to build it up repeating the process until you're happy.

This isn't the best quality picture but this was my result after using this set for the first time. I think that these mascaras can take a while to get used too as your a bit unsure on what your doing when you first use it however you get used to it after a couple of practises. This has also lasted me ages for how much I've used it so is definitely worth the money. I paid £23 for this mascara which could be considered as a lot for just a mascara but is 100% worth the money that I paid and I would happily purchase this over and over again. The 'Before' picture is normally how I'd do my every day mascara. The 'After' picture is after one coat of the Younique mascara, this is without building it up. For me, I think this made a huge difference straight away! My lashes were instantly a lot longer and thicker, almost false lash looking. This picture doesn't do much justice to how they look in person but you may still notice a difference. Overall, I love these mascaras and would definitely recommend it to anyone! It makes mascara so much easier and quicker to apply!
Anyway, I hope you enjoyed this post, let me know if it was useful or if you enjoyed it! Thank you so much for reading!
Sophie x
Follow Me @sophiesadlerx on Twitter & sophiesadlerx on Instagram
Where to find the products: https://www.youniqueproducts.com/
No comments:
Post a Comment